How Much Does a Professional Garage Floor Coating Cost?

January 5, 2025

Is your garage floor cracked, stained, or looking dull? A professional garage floor coating can do more than just improve its appearance—it can protect your floor, add long-term durability, and even increase your home’s value. Whether you’re looking for a budget-friendly fix or a premium solution that can handle daily wear and tear, Spray ’n Coat Painting has the perfect garage floor coating to meet your needs. From traditional epoxy to advanced polyurea and polyaspartic systems, let’s explore your options.


1. DIY Epoxy Kits: Budget-Friendly but Short-Term


DIY epoxy kits are widely available at home improvement stores and are a go-to option for those looking for an affordable, quick upgrade. However, while they may improve the aesthetics of your garage temporarily, they fall short in terms of durability and longevity.


  • Cost: About $250 for materials (excluding labor).
  • Installation: Involves cleaning and etching the floor, mixing the epoxy, rolling it on, and applying decorative chips for texture.
  • Pros: Inexpensive, easy to use, and a simple way to enhance appearance.
  • Cons: Prone to peeling, slippery when wet, yellows over time, and cannot handle heavy traffic or hot tires.


DIY epoxy kits are ideal for those seeking a temporary visual upgrade but lack the durability required for high-traffic or long-term use.


2. Professional-Grade Epoxy Systems: Durable, Mid-Tier Option


Professional-grade epoxy systems are a step above DIY kits, offering greater durability, chemical resistance, and polished finishes. While they provide better performance, proper installation—including diamond grinding for surface prep—is essential to prevent peeling and ensure a long-lasting result.


  • Cost: $1,500–$2,500 for a standard 2-car garage, including professional installation.
  • Installation: A multi-layer process that may include an optional urethane topcoat for added durability and gloss.
  • Pros: Chemical-resistant, customizable finishes, and easier to clean than bare concrete.
  • Cons: Takes 3–5 days to install, emits strong odors during application, and may still peel under extreme conditions.


Professional-grade epoxy is a reliable choice for moderate use but doesn’t match the advanced performance of newer technologies like polyurea and polyaspartic coatings.


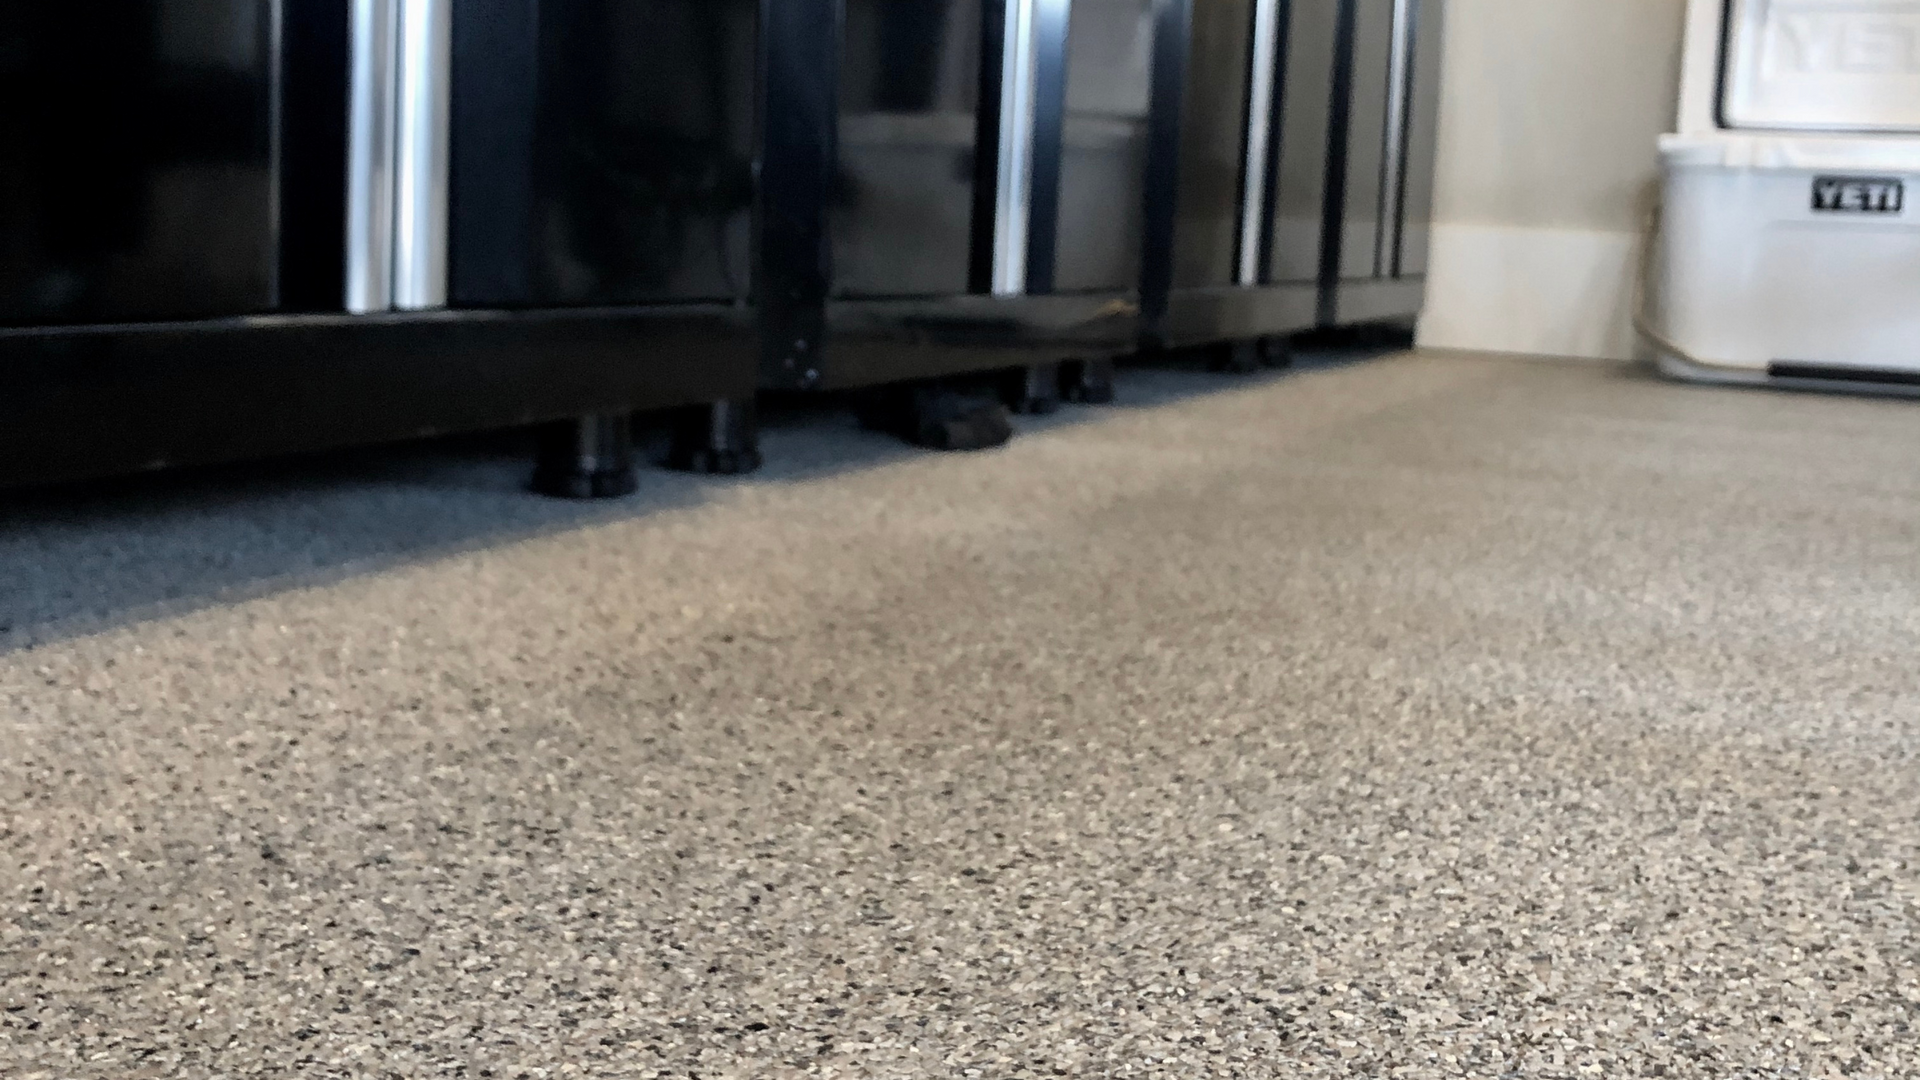
3. Full-Chip Polyurea Coatings: Premium Performance


Full-chip polyurea coatings are the ultimate solution for homeowners looking for unmatched durability and style. These coatings outperform epoxy in every way, handling heavy vehicle traffic, UV exposure, and Idaho’s extreme weather without cracking or peeling.


  • Cost: $2,500–$4,000 for a standard 2-car garage, depending on the size and condition of the concrete.
  • Installation: Completed in just 1–2 days, the process includes diamond grinding, applying a durable polyurea base coat, broadcasting decorative chips, and sealing with a UV-stable polyaspartic topcoat.
  • Pros:
  • Non-slip texture, even when wet.
  • UV stability prevents yellowing and fading.
  • Superior chemical and wear resistance.
  • Customizable colors and designs.
  • Cons: Higher upfront cost and requires clearing the garage during installation.


Polyurea and polyaspartic coatings are perfect for homeowners who want a garage floor that combines stunning aesthetics with low maintenance and long-lasting performance.


Why Concrete Prep Is Crucial


Regardless of the coating you choose, proper concrete preparation is essential for a durable finish. Diamond grinding removes dirt, oils, and surface imperfections, creating the ideal foundation for the coating to bond. Without this step, even the best epoxy, polyurea, or polyaspartic products can fail prematurely.


This is one reason many homeowners are moving away from standard epoxy systems and investing in advanced polyurea coatings, which deliver superior performance and longevity.


How to Choose the Right Garage Floor Coating


When deciding on a garage floor coating, consider the following:


  • Budget: DIY epoxy kits are the cheapest but offer limited durability.
  • Durability: Professional-grade epoxy is a solid choice, but polyurea and polyaspartic systems provide unmatched performance.
  • Aesthetics: If you want a clean, modern look that hides dirt and wear, full-chip polyurea coatings with decorative chips are the way to go.


Spray ’n Coat Painting: Your Garage Floor Coating Experts


At Spray ’n Coat Painting, we specialize in high-performance concrete floor coatings for both residential and commercial spaces in Boise, Meridian, Eagle, and the surrounding Treasure Valley.


Our offerings include:


  • Commercial-Grade Epoxy: A durable option for moderate use.
  • Polyurea and Polyaspartic Coatings: Superior solutions designed to outlast traditional epoxy systems.


Every floor coating we install is:

  • Professionally applied with meticulous prep work, including diamond grinding.
  • Backed by a limited lifetime warranty.
  • Customizable to match your style and needs.


Not only do our coatings look incredible, but they’re also tough enough to handle Idaho’s extreme weather conditions and your daily routines.


Upgrade Your Garage Today!


Ready to enhance your garage with a durable, beautiful floor coating? Contact Spray ’n Coat Painting today or fill out our request form to schedule your free on-site estimate. Let us help you choose the best solution for your garage floor and enjoy a stunning, low-maintenance finish for years to come.

September 5, 2025
Full exterior repaint brings new life to a Nampa neighborhood home At Spray ’n Coat Painting, we know that color can completely change how a home feels. For this Nampa homeowner, it was time to say goodbye to the dated tan and bring in something brighter and more cheerful. A full exterior repaint in a fresh pastel green paired with crisp ultra-pure white trim gave this home a lively new look while still feeling timeless in the neighborhood. The Scope Complete exterior repaint with repairs and prep This project involved a full repaint of the siding, trim, fascia, soffits, gutters, downspouts, and doors. Before painting, our crew filled holes along the right side of the home where an old cable had been removed, reinstalled the dryer vent, and backrolled the entire bottom edge of the home for smooth, even coverage. The System Durable coatings and careful prep for lasting results We applied pastel green as the body color, matching the soffits, front door, garage doors, and man doors to keep a clean, consistent look. The window trim, fascia, and gutters were finished in ultra-pure white for a bright, modern contrast. To ensure proper adhesion, we also primed the factory-finished gutters before painting.
September 5, 2025
A high-performance floor system for a large 2,400 sq. ft. shop We recently completed a floor coating project in Marsing for a homeowner with a spacious 2,400 sq. ft. shop. With a space this large, the homeowner needed a floor that could handle heavy use, resist staining, and still look professional. They reached out to Spray ’n Coat Painting for a better-than-epoxy solution that would be durable, easy to maintain, and visually appealing. Here’s What We Did Surface Prep and Grinding: We started by diamond grinding the entire shop floor to open up the concrete and create a proper surface for adhesion. Any imperfections were repaired to ensure the coating bonded securely. Base Coat and Decorative Flake: Once the surface was prepped, we applied our industrial-grade polyurea base coat, followed by a full broadcast of our popular Keystone chip blend. This decorative flake system not only adds traction but also provides a clean, modern look that complements a wide range of shop uses. Protective Topcoat: To finish, we installed a UV-stable polyaspartic topcoat. This protective layer seals everything in, delivering long-term resistance against abrasions, chemicals, and Idaho’s extreme temperature swings, while also making the floor much easier to clean.
September 5, 2025
A sleek cabinet makeover with soft-close upgrades and a professionally painted finish When this Meridian homeowner reached out, they had already attempted to repaint their kitchen cabinets on their own—but weren’t happy with how things were turning out. They knew they wanted a crisp, professional look and upgraded functionality. That’s where our cabinet refinishing team stepped in. We refinished all 16 cabinet doors and 14 drawer fronts in a rich charcoal hue, paired with new soft-close micro hinges to give the entire space a polished, high-end feel. The darker tone added contrast and elegance, creating the elevated finish they had originally envisioned. The Scope A full kitchen cabinet repaint with soft-close hardware installation This project included: 16 cabinet doors 14 drawer fronts Removal of old hinges and installation of new soft-close micro hinges All surfaces were cleaned, sanded, primed, and professionally sprayed using our factory-grade cabinet finish system for long-term durability and a beautiful satin sheen. The System A smooth, durable finish designed for everyday use We used a premium 2K waterborne polyurethane system from Gemini that cures harder and holds up better than traditional lacquer finishes. Unlike pre-cat lacquers or conversion varnishes that may yellow or crack over time, this cabinet-grade system resists chipping and stays looking new for years to come.
September 5, 2025
When CS Beef Packers reached out about coating specific walkways and restroom entry points in their Kuna facility, the priority was clear—improving safety and durability in areas exposed to constant foot traffic. This fast-paced industrial environment required a non-slip solution that could be installed quickly without compromising performance. We were glad to deliver a clean, safe, and long-lasting result. The Scope Strategic surface coating in hallways and entry areas This commercial floor coating project focused on two main hallway sections of approximately 100 square feet each , along with four restroom/locker room entry areas , ranging from 50–65 square feet per section. Our team completed all work in a single Saturday , carefully stopping at natural breaks in the concrete for a seamless finish that blended well with the surrounding flooring. The System Industrial-grade coating built for traction and longevity  To ensure long-term adhesion and optimal performance, we followed a multi-step process designed specifically for non-slip protection in commercial environments: Surface Prep : Concrete was aggressively sanded and ground to remove all existing coatings, wax, and surface contaminants. Epoxy Primer/Base Coat : A base layer of epoxy was applied directly to the bare concrete for strong bonding and as the foundation of the system. Quartz Broadcast : We applied a full broadcast of 50/70 mesh quartz sand into the wet epoxy to create a high-traction, textured surface. Topcoat : The system was completed with a light grey epoxy topcoat for added durability, visual clarity, and easy maintenance.
By Aaron Cote August 28, 2025
Learn how a Boise commercial painting contractor uses durable paints, coatings, and maintenance services for high-traffic commercial interiors.
By Aaron Cote August 20, 2025
Discover the ROI of repainting your commercial building with a Boise commercial painter. Learn how commercial interior painting boosts value and appeal.
By Aaron Cote August 12, 2025
Learn how a Boise commercial painting contractor meets OSHA safety standards during painting and coating projects for safe, reliable, and professional results.
By Aaron Cote August 6, 2025
Learn the key differences between commercial and residential painting. Discover why hiring a commercial painter in Boise makes sense for business owners.
August 4, 2025
Spray ’n Coat Painting recently completed a wood door refinishing project for a homeowner in Middleton, Idaho. Over time, their beautiful solid wood front door had faded and weathered from sun exposure—something we see often across the Treasure Valley. But rather than replace the door, the homeowner reached out to us to restore its appearance and match the interior wood tones for a cohesive look inside and out. Here’s What We Did We began by carefully sanding the front door and surrounding trim to remove the worn finish and prepare the surface for new stain. Before proceeding with the full application, we tested a sample stain on a small section of the door to make sure it matched the interior tones. Once approved by the homeowner, we applied stain across the entire door surface while keeping the door in place. After allowing proper dry time, we returned to apply two coats of a UV-stable clear finish. This protective layer will help preserve the color, protect against sun damage, and keep the door looking beautiful for years to come. Why Staining Is Better Than Replacing Many homeowners assume a worn or faded door needs to be replaced—but most solid wood doors just need the right restoration process. Staining not only revives the wood’s natural beauty, but also allows you to better control color tone and finish. It’s a more sustainable and cost-effective way to maintain curb appeal and protect your home’s entryway. Our UV-stable clear coats are especially important in areas like Middleton, where intense sunlight can break down traditional sealants and finishes over time.
More Posts